Purpose
This feature provides the ability to define the outside of the fascia and allow the truss overhangs or cantilevers to stop at the inside of the fascia. When fascia adjustments are made, they are based on the outside of the fascia.
Steps
To adjust fascia on overhangs and cantilevers:
Adjust Fascia on Overhang or Cantilever
- On the main Layout workspace, click Settings.
The Settings dialog displays:
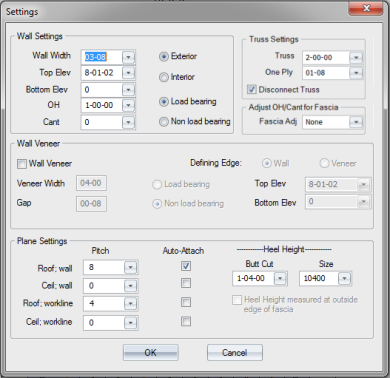
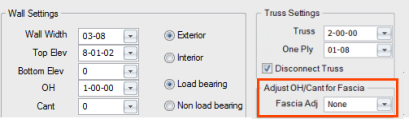
- Select an option from the Fascia Adj dropdown list. Options are: None, 01-08, 02-00, 02-08 and 03-00. The default is None, and any other dimension can be manually entered.
- Click OK.
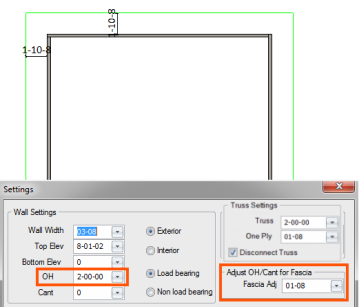
- Create walls. See Wall Input.
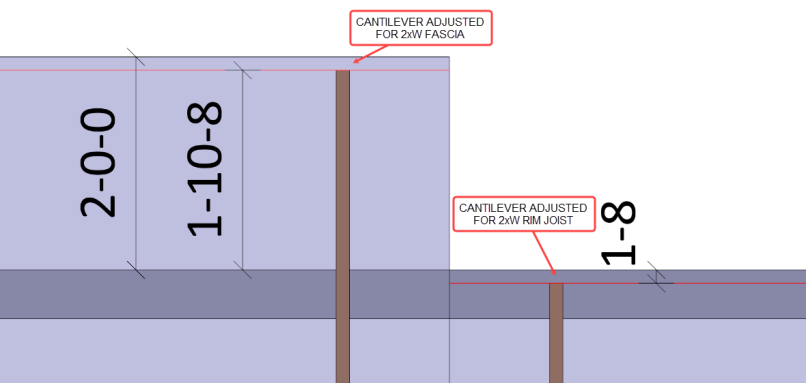
The walls are created with the overhang line located at the inside of the fascia. For example, if 2-0-0 was input for the overhang length and 01-08 was input in the Fascia Adj box, the overhang will be at 1-10-08 from the outside of the wall.
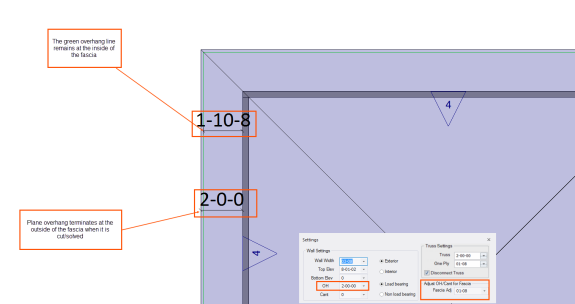
- Cut/solve the roof planes.
The overhang plane edges terminate at the outside of the fascia.
 Notes:
-
This feature works not only with cantilever overhangs, but also with rim joist on floor trusses.
-
In the Size drop down list, you can also select a nominal size. When selecting nominal sizes for Heel Height, the actual lumber size defined in EnvData > Geometry > LumberSize is used to calculate the overall heel height.
-
Heel heights are displayed in the Properties grid.
